
Visual storytelling is incredibly important on social media as people process images much faster than words. Therefore it’s crucial that you take the best photos you can and make the most out of what you have.
I’m assuming in this blog that your business operates mostly indoors and I’m aware how tricky it can be to take photos when there’s poor lighting. Fear not. You don’t need a photography degree or a fancy camera to take interesting, good quality photos. Take it from someone with a photography degree and a fancy camera.
Here are a few things to think about when taking photos:
Invest in a Tripod
- To keep photos sharp in lower light, use a tripod to keep the camera steady.
- A tripod can also give access to new angles such as higher up in the air (just set the camera on a timer and lift the whole tripod up as high as you want. There’s a little bit of trial and error involved but it can create some interesting results).
- If you don’t have a tripod, find any sturdy surface (I’ve also used someone’s steady shoulder in the past).
- A Gorillapod tripod (or similar) might also be a great option, allowing you to secure it in place when you don’t have a lot of flat surfaces available.
Make the most out of natural light
- If you’re taking photos of people, try and take them outside where you can take advantage of the natural light. An overcast or fairly cloudy day is great for taking photos. A very bright sunny day is going to leave you with harsh lighting and probably a lot of people squinting.
- If the photos have to be taken inside, use the natural light coming in through the windows, just have the people face the window as much as possible to avoid harsh shadows.
- Pick the brightest time of day (i.e midday) to make the most of the natural light.
- Use extra electric lighting if the photos are still coming out too dark (turning on room lights, moving lamps closer etc) but avoid your phone flash at all costs, that will also give you harsh shadows and won’t look professional.
Pick your background
- Consider what the background of your photo will be. It’s important to be intentional about what is visible in the frame
- The background should help to tell your story. A plain white wall doesn’t say anything.
- Avoid backdrops which include things like bins, radiators, extinguishers, healthy and safety signage etc (anything which looks a little ugly or distracting).
- Make the most out of what you have available – look for an eye-catching background like a scenic view or an architectural feature .
Don’t be afraid to get in closer
- Taking action photos from far away is easy and unintrusive but you’re always going to be too far way from what’s happening to take good photos. Be part of the action and get in as close as possible.
- If you do have a fancy SLR camera, invest in a longer lens which will let you zoom in even closer.
- Take a variety of photos, both close up and far away to give you the most options to work from when editing.
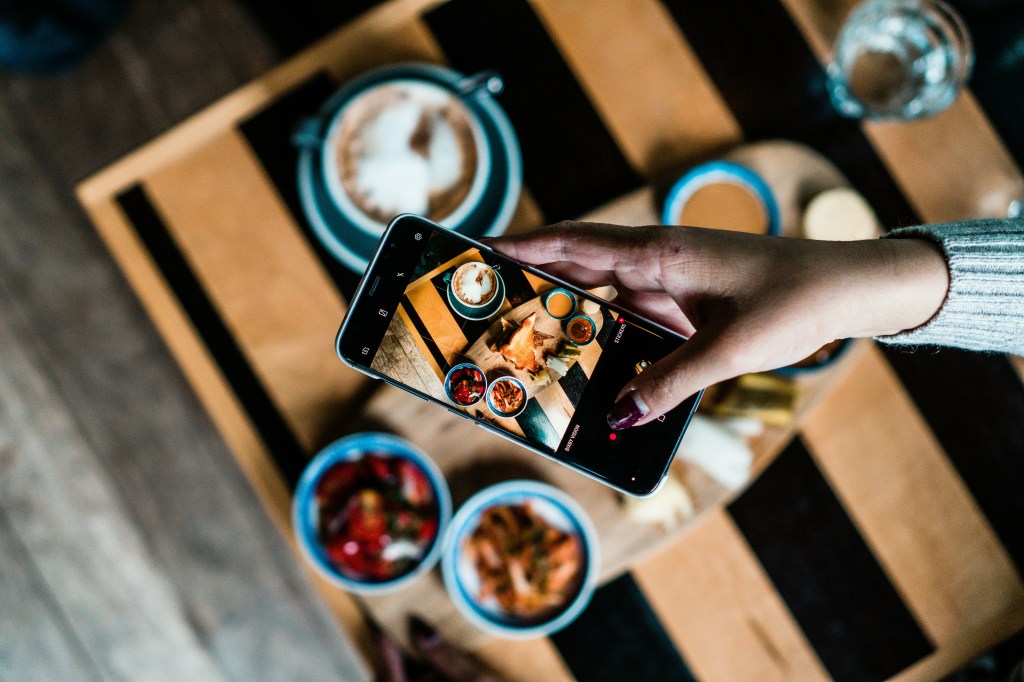
Try different angles
- Taking photos straight on is safe but can be boring. Be adventurous and get creative with your angles: try taking a bird’s eye view photo looking right down on your subject, stand on a chair to get a photo looking down at an angle or crouch down on the ground to look up.
- Shoot through items like open doors and windows to frame your subject. Unusual views will catch the viewers eye and makes the photos stand out from the crowd.
Candid vs. Posed
- Be ready to take candid photos at events or even whilst people are working. Keep your camera turned on and your finger on the button (some of the best photos can be candids as people will naturally be more relaxed and open).
- For posed photos, think about how you are posing people. Try arranging them in something other than a line or a huddle. For example, have them sit together on some steps or in a group in a few rows of chairs.
- Remember, you’re directing the photo so you are in charge. You tell them how you want them to be arranged.
Composition and Subject
- Don’t just click and shoot. Be purposeful in your composition. Think about what you want to appear in the photo (i.e remove that bag off the floor or move a distracting picture off the wall) and how you want to frame your subject (watch this video which explains the rule of thirds and other composition tips).
- Empty rooms suggest lack of work or customers, try and avoid wherever possible!
- For events, plan ahead of time and list out what photos you need to take to make sure you get everything you need
- Not everything is going to make an interesting photos. People sitting around tables listening to something is fairly dull to look at. Instead, choose the moments of action and emotion (laughter, movement, applause etc).
- Take a mix of portrait and landscape, each are going to be useful for different things (i.e a horizontal banner on your website and a vertical Instagram Stories post).
- Ensure there’s plenty of headroom in a portrait (i.e space between the top of someone’s head and the edge of the photo) you can crop a photo down if there’s too much space but you can’t do the opposite if you cut off the top of their head.
Posting to social media
- Give the photos a quick edit in a tool like Canva before you post. It might only need a little bit of a brightness/contrast adjustment and there are often automatic tools that will do it for you. Crop out anything you don’t want appear in the image too.
- Post only the best photos and keep your selection to a minimum. No-one is going to look through all the photos you post. Others can be saved for future social media content, web and print.
- Try and give all the photos you post an alt-text description for accessibility.
- Tag accounts and people if it gives you the option.
Have any questions? Let me know in the comments below.
Looking for photography training for your business or charity? Get in touch using the contact link to see how I can help you.

Leave a comment